


Let's get one thing straight right away about TradingView automated trading: the platform itself doesn't actually place the trades for you. It's an incredible tool for charting, analysis, and generating signals, but to make those signals execute automatically, you'll need to link it to an outside automation service like EzAlgo.
It’s a common misunderstanding that you can just flip a switch inside TradingView and have it start trading on your behalf. The platform is built to be a top-tier analysis and social hub for traders, not a brokerage that can directly execute orders. This is often the first hurdle new automated traders face.
Even though TradingView is one of the most popular charting platforms out there, its support for fully automated trading is still indirect as of mid-2025. This isn't an oversight; it's a deliberate choice. The complexities of broker integrations and regulatory requirements mean they focus on what they do best: charting and alerts.
Because of this, savvy traders have found a rock-solid workaround. They use TradingView's powerful alert system to send signals via webhooks to third-party tools, which then handle the execution. This has become the standard way to achieve true automation. You can learn more about these integration methods in this in-depth guide on auto-trading with TradingView.
So, what are your options? Essentially, it boils down to using TradingView's native, but limited, capabilities versus integrating a more powerful third-party webhook service. This table breaks down the key differences to help you see why the webhook method is the go-to for serious automation.
As you can see, while TradingView provides a basic framework, using a webhook service unlocks the platform's full potential for building a sophisticated and reliable automated trading system.
How do you actually connect these pieces? The magic happens through webhooks.
Think of a webhook as a digital messenger. When your strategy on TradingView spots a trading opportunity—say, a moving average crossover—it triggers an alert. But instead of just pinging your phone, this alert sends a specially coded message (the webhook) to your automation tool.
A service like EzAlgo acts as the crucial middleman. It catches that webhook, instantly understands the command inside it (buy, sell, how much), and passes it on to your connected brokerage to be executed. This all happens in a fraction of a second, creating a smooth, hands-free trading system.
Key Takeaway: True TradingView automated trading is a three-part system. Your strategy on TradingView finds the signal, a webhook sends the signal, and a third-party service like EzAlgo places the trade with your broker. It’s a team effort, not a built-in feature.
This setup gives you the best of both worlds. You get to use TradingView’s phenomenal charting and Pine Script language to create and backtest your ideas, while a specialized automation platform handles the mission-critical job of executing orders.
Here’s a look at the familiar interface where it all begins.
This chart is your canvas. It's where you combine indicators, price action, and custom scripts to bring your automated strategies to life. The rest of this guide will walk you through turning these visual signals into real, automated trades.

Alright, with the basics down, it's time to get our hands dirty and build the engine for your TradingView automated trading setup. This is where the magic happens: inside the Pine Script editor. Here, we'll lay out the exact rules your bot will follow. Don't sweat it if you're not a coding wizard—the goal is clear, unambiguous logic, not complex software development.
Think of your script as the brain of the operation. It needs to know precisely when to buy, sell, or get out of a trade, all without a moment's hesitation. This is the heart of automation—taking human emotion out of the equation and letting data-driven rules run the show.
Pine Script is TradingView's own language, built from the ground up for creating custom indicators and, most importantly for us, trading strategies. To tell TradingView that our script is meant to generate actual trade signals, we start with the strategy() function. This sets the stage, giving our strategy a name and defining its core behaviors.
The real workhorses are the strategy.entry() and strategy.close() commands. These are what turn your trading idea into actions your bot can understand. For instance, a classic moving average (MA) crossover strategy would use strategy.entry() to fire off a buy order the moment a faster MA crosses over a slower one.
Let's walk through a simple MA crossover script to see this in action. The logic is as straightforward as it gets:
In Pine Script, we first define these two EMAs and then create the conditional logic for our entries and exits. The code itself is surprisingly clean:
// © YourName
//@version=5
strategy("My MA Crossover Bot", overlay=true)
// Define Moving Averages
fastMA = ta.ema(close, 9)
slowMA = ta.ema(close, 21)
// Entry and Exit Conditions
longCondition = ta.crossover(fastMA, slowMA)
exitCondition = ta.crossunder(fastMA, slowMA)
// Execute Trades
if (longCondition)
strategy.entry("Enter Long", strategy.long)
if (exitCondition)
strategy.close("Enter Long", comment="Exit Long")
See how there's no ambiguity? The rules are crystal clear, which is exactly what we need for automation.
Expert Tip: Always give your entry and exit commands unique IDs, like
"Enter Long". This is absolutely critical. The webhook message we'll set up later needs to reference these specific IDs to know which action to take. Don't skip this.
A good strategy doesn't just look for entries; it protects your capital. You can, and should, build your risk management right into the Pine Script itself. Stop-loss and take-profit levels can be added directly to your strategy.entry() command.
For example, we can modify our entry command to include a 2% stop-loss and a 4% take-profit target:
strategy.entry("Enter Long", strategy.long, stop=close * 0.98, limit=close * 1.04)
By embedding risk parameters directly into your code, you guarantee that every single trade your bot places is protected from the get-go. While this is a basic example, you can learn about more advanced techniques in our guide to automated trading strategies.
Now that you’ve coded your Pine Script logic, it’s time to build the bridge between your strategy and the live market. This is where TradingView automated trading gets a bit technical, but honestly, it's the most critical piece of the puzzle. We'll be using webhooks to fire your buy and sell signals from a TradingView alert directly to your broker, using an automation service like EzAlgo to handle the execution.
Think of a webhook as a dedicated messenger URL. When your strategy triggers an alert on TradingView, it pings this URL with a specific command. The automation tool on the other side catches that message and instantly places the trade. Getting this connection right is everything; a single typo can mean a missed trade or, worse, an unintended one.
First things first, you need to create an alert linked to your Pine Script strategy. With your strategy already on the chart, just click the "Alert" button. In the settings that pop up, you'll select your strategy under the "Condition" dropdown. This tells TradingView to trigger the alert whenever the specific conditions you coded—like our moving average crossover—actually happen on the chart.
The most important part of this whole setup is the "Message" box. This isn't for you to write notes to yourself. It's a precise command that your automation tool needs to understand. Every service has its own syntax, but they all need specific details to execute a trade correctly.
Key Takeaway: The "Message" field isn't optional or a place for notes. It must contain the exact command syntax your automation software requires. In my experience, 90% of automation errors trace back to a simple mistake in this message format.
This flow chart breaks down the entire process, from defining your strategy to the final trade execution.
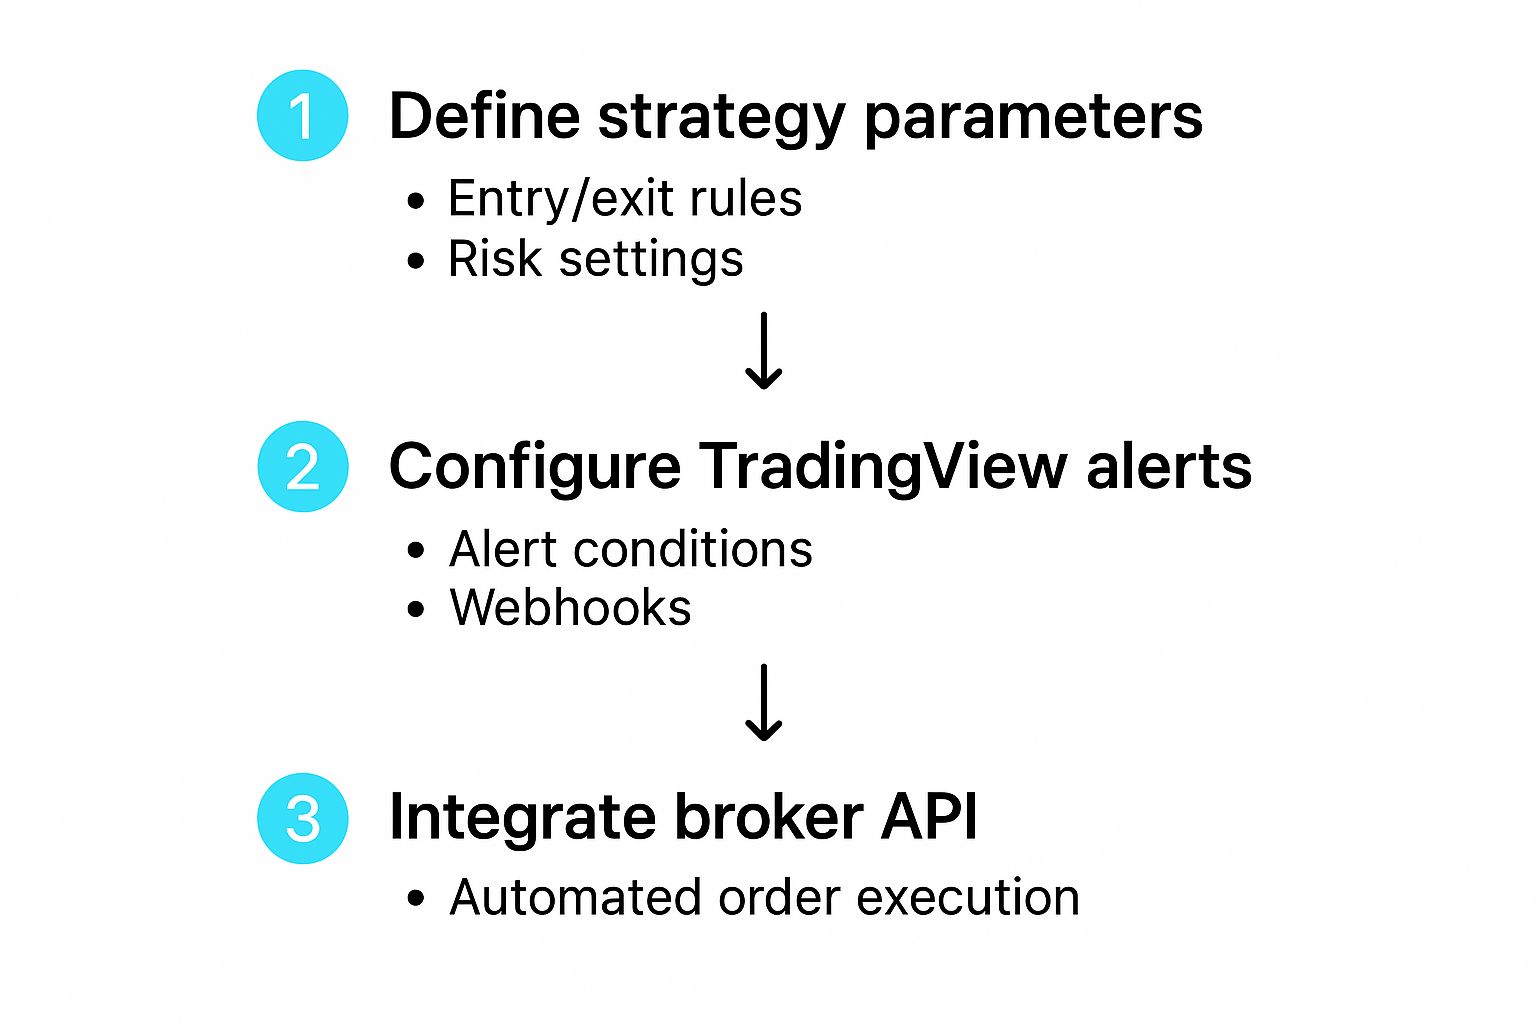
As you can see, it’s a straightforward sequence. Your alert is the essential middleman, translating your strategy’s logic into something your broker can act on.
The message sent through the webhook has to be perfectly structured. It’s less like a message and more like a line of code. You’ll usually need to include parameters for:
buy or sellBTCUSD or AAPLFor instance, a buy command for EzAlgo might be a small JSON object containing these key-value pairs. Precision is non-negotiable here; it's what ensures the right trade gets placed instantly. The TradingView automated trading world has come a long way, with new drag-and-drop tools and alerts offering over 10 customizable conditions to make this a bit easier. You can find more details on these new features here.
Finally, you’ll need the webhook URL itself. Your automation service (like EzAlgo) will provide this. Just copy it, head to the "Notifications" tab in your TradingView alert settings, and paste it into the "Webhook URL" field.
Once you hit save, you're live. Your strategy's signals are now directly connected to your execution platform, ready to become real trades.
Before you even think about putting real money on the line, you have to validate your strategy. This isn't optional. Jumping into TradingView automated trading without this step is like trying to fly a plane you’ve never seen before—it’s a recipe for disaster.
This is where the one-two punch of backtesting and paper trading comes in. They are your most important safeguards.
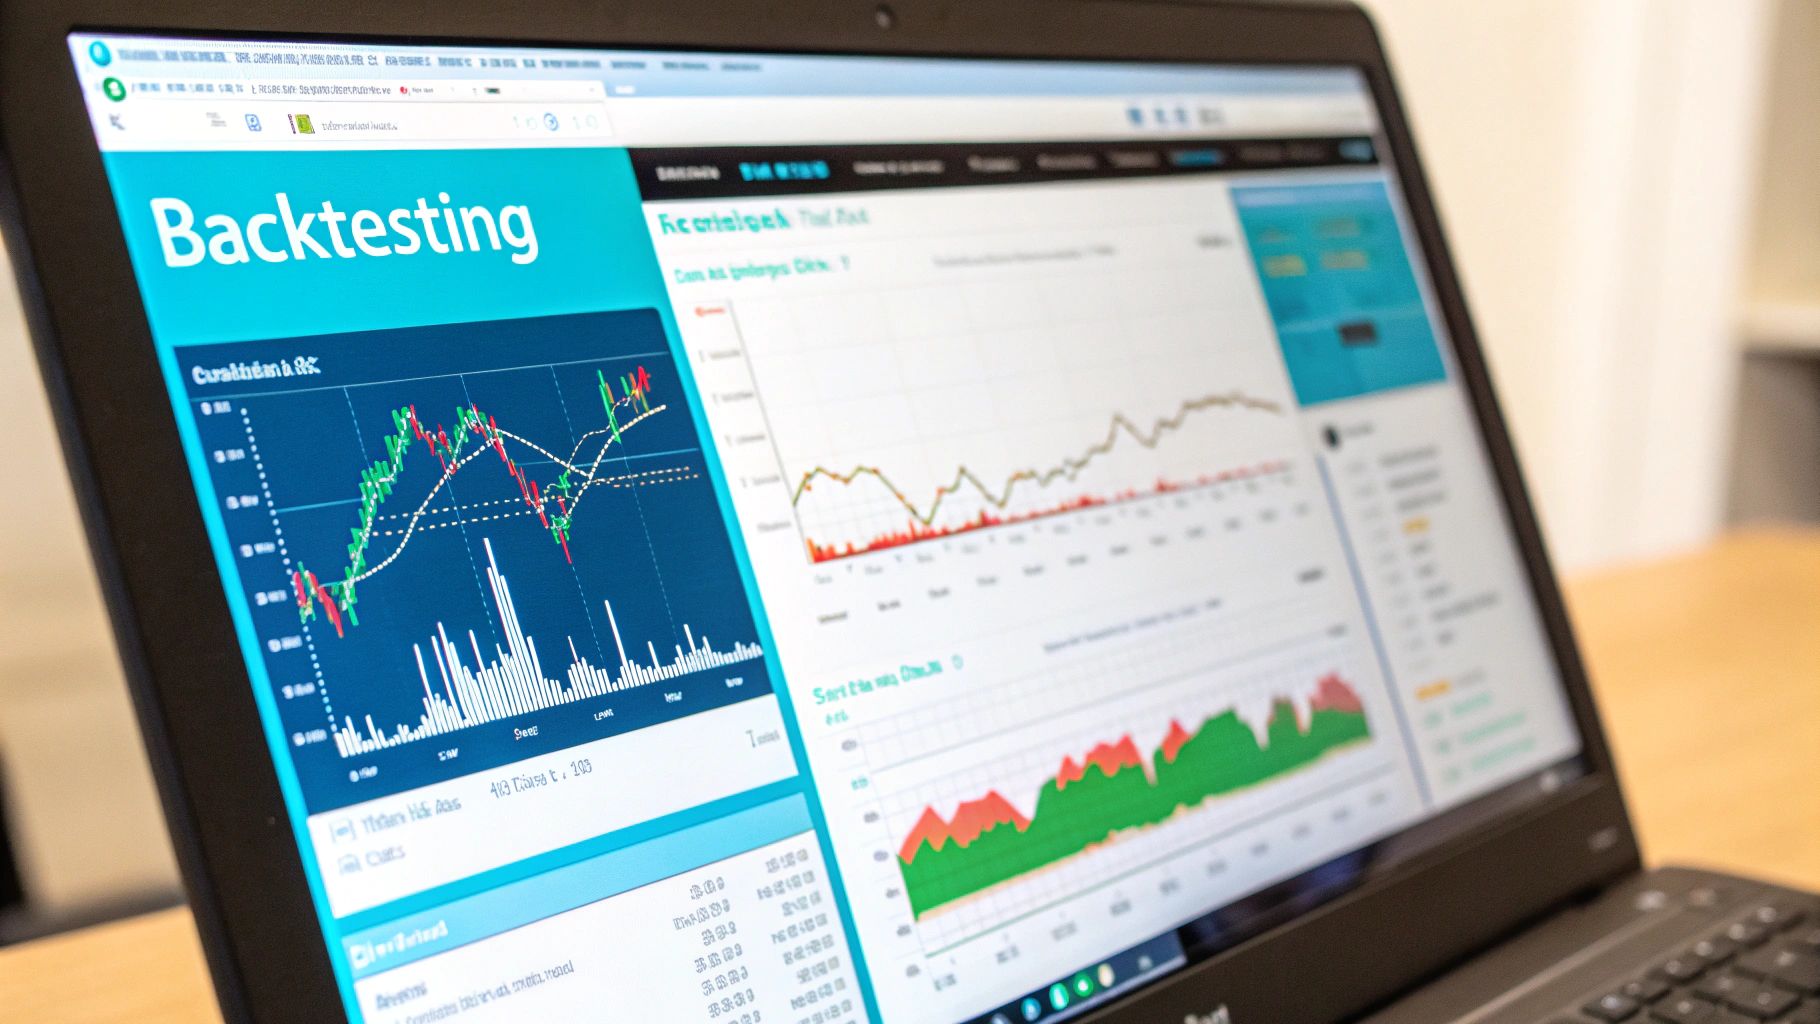
First up is TradingView's built-in Strategy Tester. After you’ve applied your Pine Script strategy to a chart, this tool gets to work, running your logic against historical market data. It crunches all the numbers and spits out a detailed report, giving you the first real clue as to whether your idea has any legs.
The Strategy Tester report is packed with metrics that tell the story of your strategy's past performance. If you don't understand these numbers, you're just guessing.
Here's what I always look at first:
Think of these numbers as your first filter. A strategy that looks bad on paper will almost certainly get shredded in a live market. If you want to get really good at this part, check out our full guide on how to backtest on TradingView.
A solid backtest is a great starting point, but it's not the finish line. Historical data can't predict everything. It doesn't account for real-world friction like slippage, latency between systems, or a sudden API hiccup. That's why paper trading is the next, and absolutely essential, step.
Paper trading isn't just about testing your strategy; it's about testing your entire automated system. This is where you run your fully connected setup—TradingView alerts, webhook messages, and your broker connection—in a live market with zero financial risk.
I've personally seen countless strategies that looked amazing in a backtest completely fall apart here. Maybe the webhook messages were formatted slightly wrong, causing orders to fail. Or maybe unexpected volatility caused so much slippage that a "profitable" strategy started bleeding cash. While most of your signals should hit their target in under a second, delays can and do happen.
Consider this phase your final shakedown cruise. It’s your opportunity to find and squash all those little real-world bugs before they can do damage to your actual account. My best advice? Treat your paper trading account like it's real money. The psychological and performance insights you'll gain are invaluable.
You’ve put in the work. The backtesting looks solid, paper trading went smoothly, and now you’re at the starting line, ready to deploy your automated strategy with real capital. This is where the rubber meets the road, and a final pre-flight check can save you from a lot of unnecessary headaches.
Before you do anything else, go through a quick sanity check. I can't tell you how many times I've seen a simple typo derail an entire setup. First, double and triple-check that the webhook URL in your TradingView alert is perfect. One wrong character and the whole thing fails. Then, pop over to your automation platform and confirm your API keys are correct and have the right trading permissions enabled on your brokerage account.
If I can offer one piece of advice from experience, it’s this: always start small. Seriously. Don’t jump in with your full position size on the very first day. Cut it way down—maybe to just 10% or 20% of what you plan to trade normally. Run it like this for at least a few days.
The goal of your first live run isn't to hit a home run. It's to prove that the entire system—from the TradingView signal to the broker's execution—works exactly as expected in a live, unpredictable market. A small position size keeps the risk low while you iron out any kinks.
This initial run is your final shakedown cruise. It's where you'll spot the little things that backtesting can't always predict. For instance, you might find that real-world slippage is a bit higher than you modeled, which might mean you need to tweak your profit targets or stop-loss settings just a bit.
One of the biggest mistakes I see new traders make is thinking automation is a "set it and forget it" game. Nothing could be further from the truth. The most successful automated traders are diligent managers who actively oversee their systems, especially when they're new.
Your role changes from being the trade executor to the system's pilot. You're there to monitor performance and make sure everything is running smoothly. Here’s how you stay on top of it:
Think of it like being the captain of a ship with a sophisticated autopilot. You let the system do its job, but you’re always on the bridge, ready to grab the helm the moment the weather turns.
Even with a perfect setup, you're bound to run into a few head-scratchers. The world of TradingView automated trading is full of little technical details, and it's completely normal to hit a snag or just wonder if you're doing something the best way. I've been there. This section breaks down some of the most common questions I hear from traders as they build out their automated systems.
Think of this as your go-to guide for those "why isn't this working?" moments. When an alert doesn't fire or a trade seems off, the answer is usually found in how these different pieces of tech talk to each other.
This is a big one. It would be incredibly convenient, but the short answer is no—at least not in the way most people imagine. Most automation platforms that link up with TradingView don't have a universal "close all" command that works with a single webhook. The whole system is built for precision, meaning it needs a specific signal for a specific symbol.
So, if you have open positions in BTCUSD, ETHUSD, and NVDA, you'll need to send three distinct exit commands. Each one needs to be targeted to its specific ticker. While some services are exploring a global exit feature, you should plan your scripts and alerts to manage each trade on its own for now.
Speed is everything in trading, right? The good news is that the delay between a TradingView alert firing and your automation tool getting the signal is usually tiny. We're talking less than one second in most cases.
But that's not the whole story. The real bottleneck is almost always on your broker's end or simply due to market conditions at that exact moment. Your automation tool can fire off the order instantly, but how long it takes the exchange to actually fill it is a completely different variable.
Here's a Pro Tip: You can actually measure the webhook latency yourself. Many automation platforms let you stick a "time now" variable into your webhook message. Just compare that timestamp to the time the log entry shows up in your automation tool, and you'll get a precise measurement of that specific delay.
You had a good thing going, and then… silence. If your alerts suddenly stop working, don't panic. The cause is rarely a massive system outage. More often than not, it’s a small configuration issue you can fix in a minute or two.
I've put together this quick troubleshooting guide based on the most common issues I see. Before you spend hours digging through code, check these things first.
When your automation hits a bump, the fix is often simpler than you think. This table covers the most frequent problems and where to look for a solution.
Running through this quick checklist usually solves about 90% of the alert issues traders run into.
What happens if you spot an opportunity and jump in manually? Can you let your bot take over from there? With most well-designed automation tools, the answer is a resounding yes.
The platform is smart enough to track your total position size for a given symbol, regardless of whether it was opened by the bot or by you. When your Pine Script strategy sends an exit signal that matches that open position, the system will close it just as you intended. This gives you a fantastic amount of flexibility, letting you blend discretionary entries with fully automated exits and risk management.
Ready to take the guesswork out of your trading and build an automated system you can actually rely on? EzAlgo provides the powerful indicators and seamless integration you need to bring your TradingView strategies to life. It's time to stop staring at charts and start automating with precision.


%201.svg)