


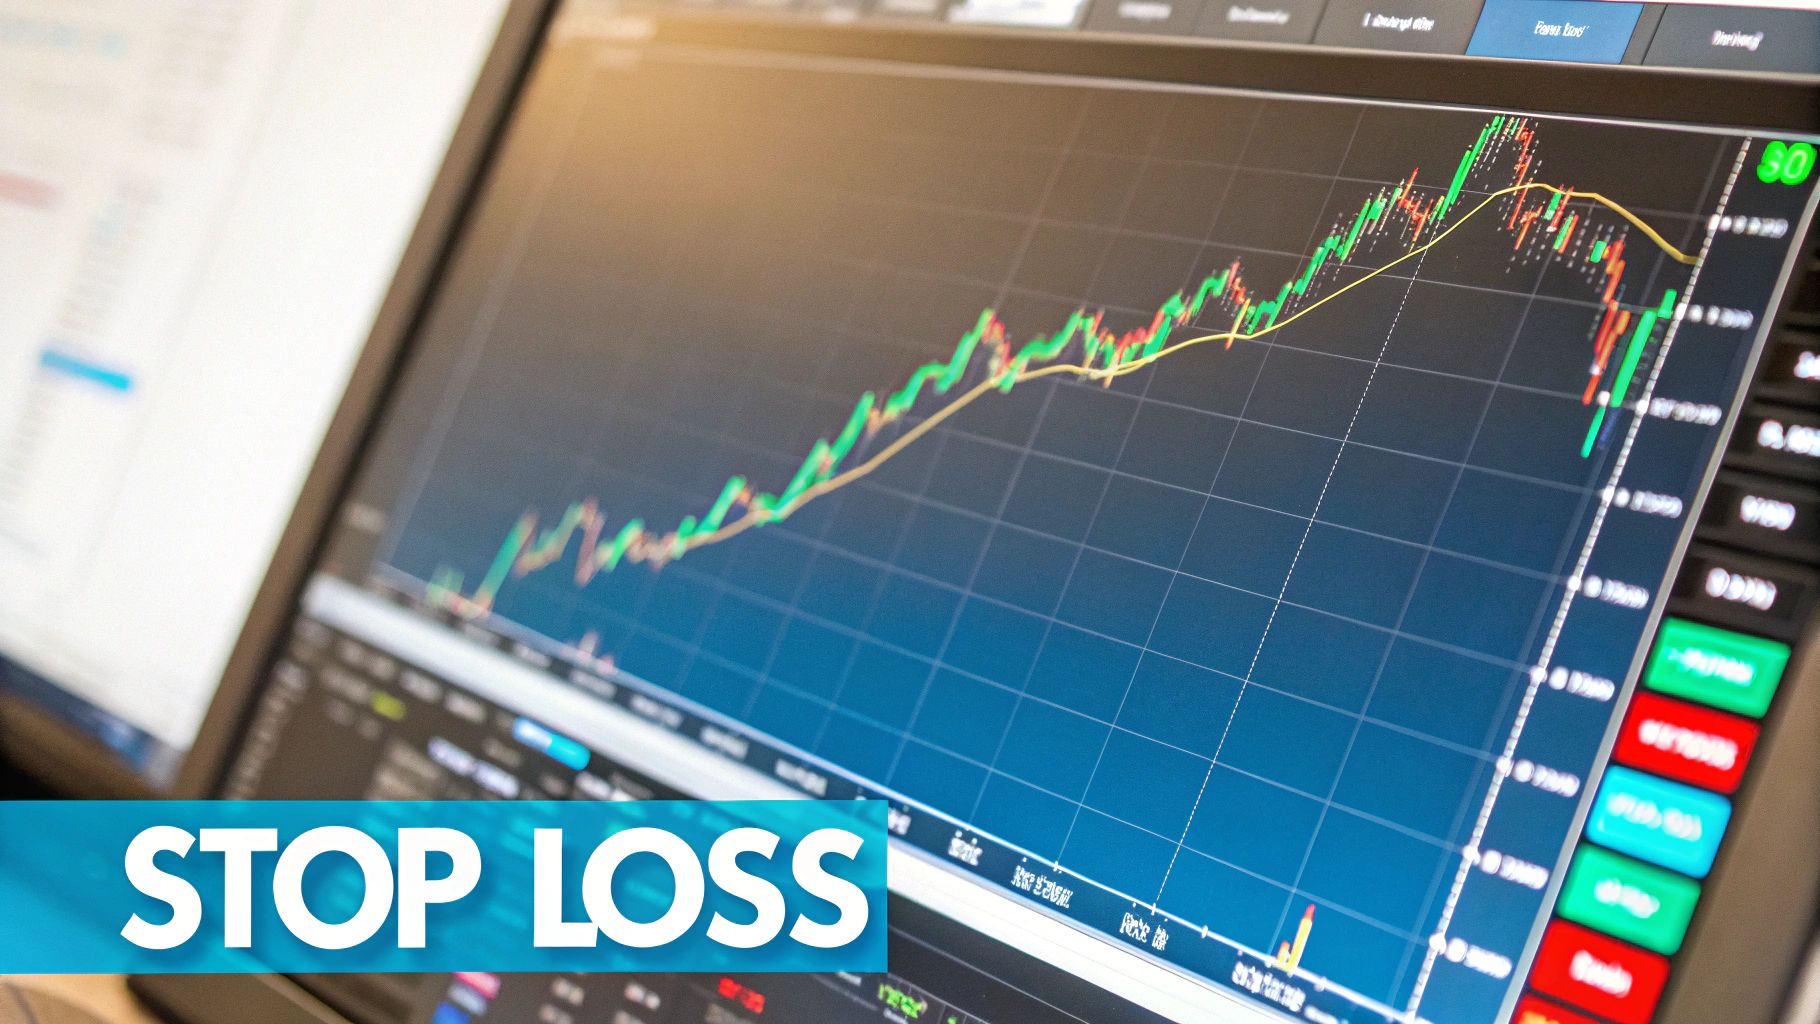
Ever tried driving in a new city without a map? It's chaos. That's what trading without a plan feels like. Think of a Stop Loss as your emergency brake—it stops a small mistake from becoming a total wreck. A Take Profit is your destination, making sure you actually take the right exit and bank your winnings. These two orders aren't just suggestions; they're the bedrock of smart, disciplined trading.

Jumping into the market without knowing where you'll get out turns trading into pure gambling. The whole point of setting a take profit and a stop loss is to get your emotions out of the driver's seat before the trade even begins. Hope is a terrible strategy for a losing trade, and fear can make you bail on a winning one way too early.
When you set these orders beforehand, you’re committing to a plan based on logic, not gut reactions to a flashing screen. This is the kind of discipline that separates seasoned traders from amateurs. It creates a solid framework for managing your risk and locking in profits, which is the only way to stay in this game long-term.
Look at these two orders as your non-negotiables for every single position. They do different jobs, but they work together to protect your money and grow your account over time.
Your Safety Net (Stop Loss): This order automatically closes your position if the price moves against you to a certain point. Its only job is to limit how much you can lose. It's your defense, making sure one bad call doesn't blow up your account.
Your Exit Plan (Take Profit): On the flip side, this order automatically closes your trade when it hits a specific profit goal. It secures your gains before the market has a chance to turn around and take them back. This is your offense—it makes sure you get paid when you're right.
By deciding your maximum loss and your profit target up front, you stop chasing the market and start executing a real strategy.
At the end of the day, using take profit and stop loss orders is about building professional habits. It forces you to weigh the risk and reward of every trade, creating the disciplined mindset you absolutely need to navigate the markets.
Think of take profit and stop loss orders as your pre-set exit plan. They are automated instructions you give your broker, telling them exactly when to close your trade. This simple concept is the foundation of disciplined trading, taking emotion out of the equation and letting your strategy do the work. You don't have to be glued to your screen, because your plan is already in place.
A Stop Loss (SL) order is your financial safety net. It’s an instruction to automatically sell your position if the price drops to a specific level you’ve chosen. Its only job is to limit how much you can lose on any single trade. It's what keeps a bad call from turning into a disaster for your account.
On the flip side, a Take Profit (TP) order is your victory lap. It’s an instruction to sell your position once the price hits your target profit. This is how you lock in your winnings before the market decides to turn against you, converting a paper gain into real money.
So, how does this actually work in practice? It’s pretty straightforward.
When you enter a trade, you can set both orders at the same time. Let’s say you buy a stock at $100. You might decide to place your stop loss at $95 and your take profit at $110.
This system works for you 24/7, protecting your capital and cashing in your wins even while you’re busy with work or sleeping. It’s a core principle of responsible trading that you just can't skip.
These automated ‘exit orders’ are non-negotiable for serious traders. They allow for a disciplined, hands-off approach to managing trades by defining your maximum risk and desired reward before emotions can interfere.
Without these orders, you're flying blind. Every little price movement becomes a test of your nerves, inviting you to make emotional decisions. You might hang on to a losing trade for far too long, convinced it will "come back," or you might panic-sell a winning trade way too early, terrified of losing what you’ve made. Automation sidesteps these psychological traps entirely.
This is especially true in fast-paced, 24-hour markets like Forex. For traders dealing with major currency pairs like EUR/USD, stop-loss and take-profit orders are absolutely essential. For instance, a trader might set a take-profit at a 2% gain to automatically cash out in a rapidly moving market. By pairing that with a stop-loss set at a 1% loss, they create a clear, disciplined framework that protects their money and builds consistency. You can explore more about these essential Forex strategies and see how traders around the world apply them.
While you can always set these levels manually based on your own analysis, tools like EzAlgo can give you a data-driven edge. Instead of guessing where your exit points should be, you get automated signals pointing to strategic levels.
For example, when EzAlgo flashes a buy signal, it often highlights the next major resistance level on the chart. That gives you a logical, algorithmically-backed target for your take profit order. At the same time, it can show you the nearest support zone—the perfect place to tuck your stop loss just beneath, protecting you from a sharp drop. This approach roots your exit strategy in real market data, not just a gut feeling.
Figuring out where to place your take profit and stop loss orders is a crucial skill. It's really a mix of solid technical analysis and being honest with yourself about your risk tolerance. While there's no magic bullet, a few proven methods can give you a solid framework to work from. The moment you move past simple guesswork and start applying a consistent strategy is a huge leap forward in disciplined trading.
The real goal is to find a method that clicks with your trading style and makes sense for the asset you’re trading. Whether you like a simple, set-it-and-forget-it rule or a more dynamic approach that moves with the market, what matters most is having a clear reason for every exit point you set.
If you're just starting out or simply prefer a straightforward, consistent approach, the percentage method is a great place to begin. The idea is simple: you set your stop loss and take profit as a fixed percentage away from your entry price. For example, you might decide you're never going to risk more than 2% on a single trade.
Let's say you buy a stock at $50. A 2% stop loss would go in at $49. You could then aim for a 4% gain, setting your take profit at $52. Just like that, you've established a 1:2 risk-to-reward ratio. You're aiming to make double what you're willing to lose. It's a clean method that helps keep your risk management consistent from one trade to the next.
This image below does a great job of showing how different risk-to-reward ratios stack up.
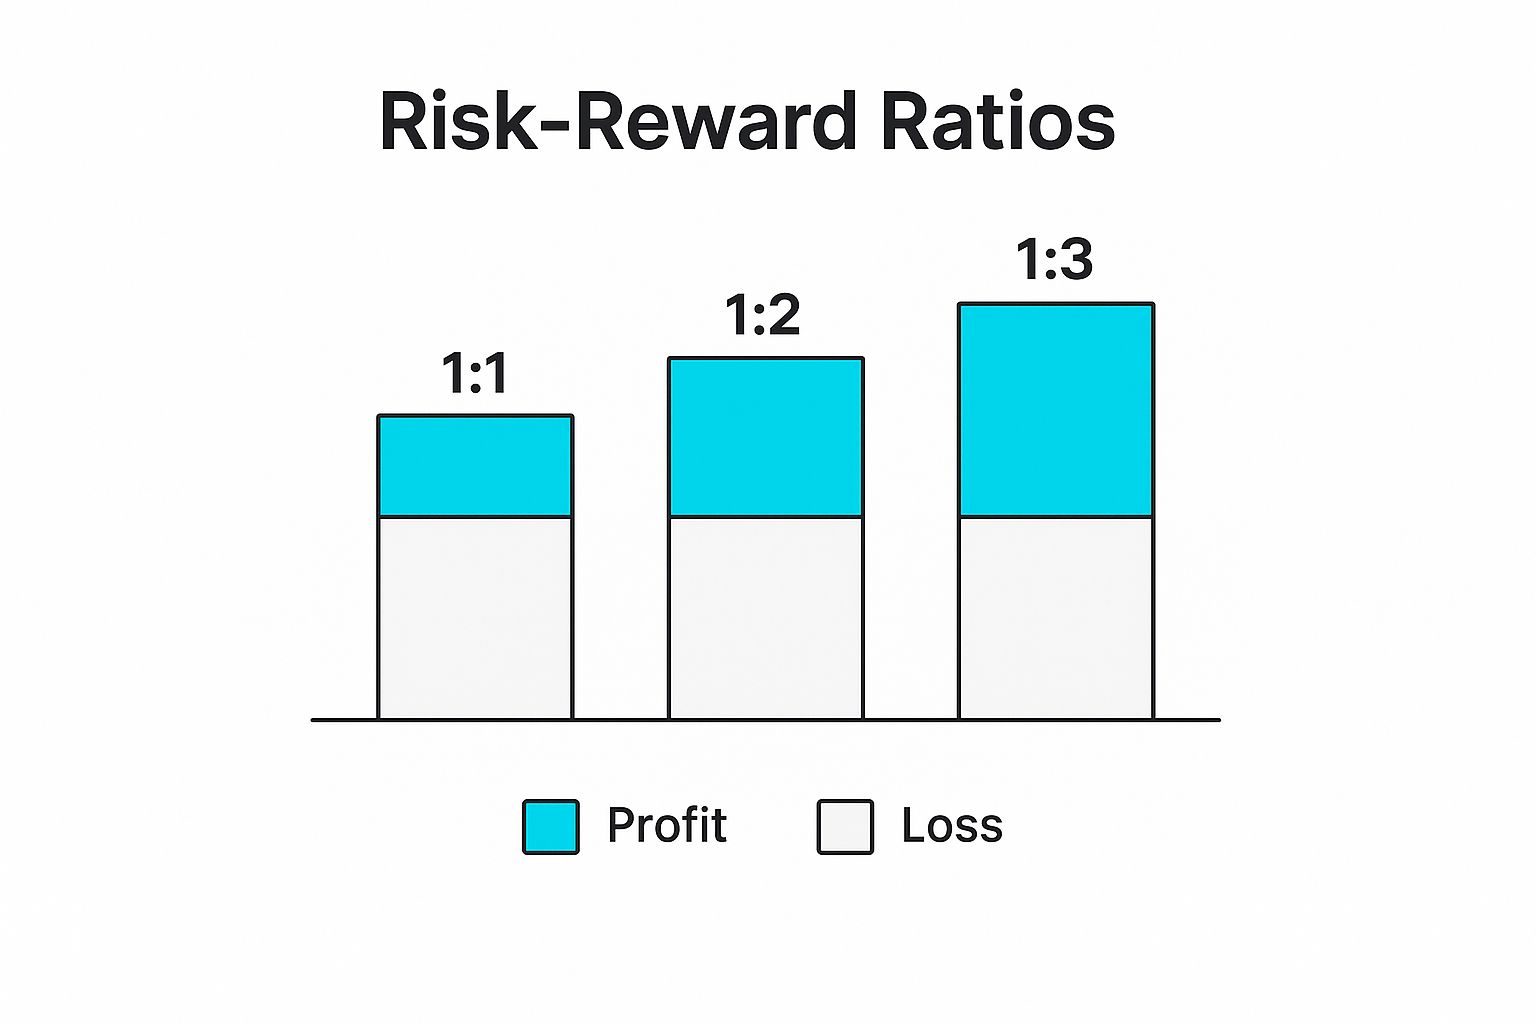
As you can see, a higher ratio like 1:3 means you’re shooting for a much bigger win compared to your potential loss.
For a more nuanced approach, you can turn to technical analysis to pinpoint logical price levels for your exits. This method grounds your decisions in how the market is actually behaving, rather than just picking a number out of thin air. The two most powerful concepts here are support and resistance.
By setting your stop loss just a bit beyond these key zones, you give the trade some breathing room. This helps you avoid getting knocked out of a good position by the market's normal daily chatter, often called "noise."
Using support and resistance levels lets the market tell you where the most strategic exit points are. It shifts your strategy from being based on what you hope will happen to what the chart shows is likely to happen.
Markets are never one-size-fits-all; they can be sleepy one day and wild the next. A stop loss that works in a calm market might be way too tight when things get choppy. That’s where the Average True Range (ATR) indicator comes in handy. It essentially measures how much an asset’s price is moving, on average, over a set period.
By using a multiple of the ATR, you can set a stop loss that automatically adjusts to the market’s current mood. For instance, you could place your stop 2x the current ATR value below your entry price. When the market is volatile and the ATR is high, your stop will be wider. When things calm down and the ATR is low, it will be tighter. It’s an adaptive method that can help prevent those frustrating moments when a predictable price swing stops you out too early.
For traders who want a purely data-driven way to find their exits, automated trading signals can take the guesswork completely out of the equation. Platforms like EzAlgo are designed to analyze market data in real-time, highlighting strategic entry and exit zones for you.
When EzAlgo flashes a buy signal, it can also point out the nearest major resistance level as a prime take profit target. At the same time, it will identify key support zones, giving you a logical place to put your stop loss. This effectively automates the heavy lifting of technical analysis, giving you clear, actionable levels based on algorithms instead of emotion. It’s a great way to make sure every exit you set is grounded in objective market data.
To help you decide which approach might be best for you, let's break down the options.
This table compares common methods for determining Take Profit and Stop Loss levels, helping traders choose the best approach for their style.
Ultimately, the best method is the one that you understand, trust, and can apply consistently. Many experienced traders even combine these techniques, using support and resistance to find a target area and then using the ATR to fine-tune their exact stop loss placement.

Here's a secret many new traders miss: winning isn't about being right all the time. It’s about making sure your wins are bigger than your losses. The one concept that makes this possible is the risk-to-reward ratio.
At its core, this ratio is just a simple piece of math that answers the question: "How much am I willing to risk to make a certain profit?" It’s the bedrock of any solid trading plan, and your take profit and stop loss orders are what bring it to life.
Think of it this way. If you risk $100 on a trade hoping to make $200, your risk-to-reward ratio is 1:2. You're aiming to win twice what you're willing to lose. This simple discipline is what separates amateurs from pros, because it allows you to be profitable even if you lose more trades than you win.
Figuring out your risk-to-reward ratio is something you should do before you ever click the "buy" or "sell" button. It’s the engine that powers a logical trading plan, not an emotional one.
First, you just need to know the distance from your entry price to your stop loss and your take profit.
The formula is dead simple: Ratio = Potential Reward / Potential Risk.
Let's walk through a quick example. Say you want to buy a stock that's currently trading at $50. Your analysis tells you to set a stop loss at $48 and a take profit target at $56.
Your risk-to-reward ratio for this trade is a healthy 1:3. For every $1 you're putting on the line, you stand to make $3. That's a setup that puts the odds firmly on your side. For a deeper look at these calculations, check out our guide on using a risk-reward ratio calculator for more examples.
This is where the magic really happens. If you consistently maintain a positive risk-to-reward ratio—where your potential reward is greater than your risk (like 1:1.5, 1:2, or 1:3)—you completely flip the script on what it takes to be profitable.
Let's compare two traders:
Getting the risk-to-reward concept right shifts your entire mindset. You stop chasing every single win and start building a system where the math works in your favor over the long haul.
By patiently hunting for trades with favorable ratios, you build a powerful statistical edge. The pressure to be perfect vanishes. Instead, you can focus on executing your strategy with discipline, knowing that your winning trades will more than cover your losses over time. This is the heart of professional risk management.
Once you get the hang of setting a basic take profit and stop loss, it's time to explore more dynamic ways to manage your trades. Static exit points work well, but the real art comes from adapting to a trade as it plays out. This flexibility lets you squeeze more profit from a strong trend or cut a dead-end position loose before it causes trouble.
Think of it as moving beyond a simple "set it and forget it" approach. Dynamic management means you’re actively reacting to how the price behaves after you enter, protecting your profits and adjusting your risk in real time. It's what separates seasoned traders from beginners.
One of the best tools for this is the trailing stop loss. Imagine a stop loss that’s smart—it follows the price up as you profit but instantly locks in place the moment the market turns against you. The whole point is to let your winners run while systematically banking the gains you've already made.
Here’s a quick example: You buy a stock at $100 and set a $5 trailing stop. Right away, your stop loss is at $95. If the stock rockets to $110, your trailing stop automatically climbs to $105, always staying $5 below the new peak. If the stock then dips, your stop stays put at $105, guaranteeing you walk away with at least a $5 profit.
This is a game-changer in trending markets. A fixed take profit might have you cashing out way too early, but a trailing stop lets you ride the wave for as long as it lasts, often capturing far bigger wins than you ever planned for.
Here's another pro tactic: moving your stop loss to your entry price—or breakeven—once the trade is comfortably in the green. It’s a beautifully simple way to take all the risk off the table, turning a good trade into one you literally can't lose.
It works like this:
Just like that, the worst that can happen is you get stopped out for zero loss (minus commissions). This move frees you from the anxiety of watching a winner turn into a loser and gives the rest of your position a completely risk-free shot at hitting a much bigger second target.
While a classic stop loss is a great defensive tool, the data suggests dynamic approaches like trailing stops can seriously improve returns. One detailed study, analyzing strategies from 2000 to 2011, found something fascinating. While a fixed 15% stop loss beat a simple buy-and-hold strategy, trailing stops did even better.
The numbers showed that trailing stops delivered higher returns at most risk levels, with a standout 27.47% better performance at the 20% trailing stop level. This tells us that dynamically protecting your gains isn't just a clever trick—it's a statistically proven way to improve your results. You can read the full analysis on stop loss performance to dive into the numbers yourself.
By automatically moving to protect profits, a trailing stop loss allows you to stay in a winning trade longer without giving back your hard-earned gains. It strikes a balance between securing profits and allowing for further upside potential.
Finally, not every bad trade hits your stop loss. Some just go sideways, doing absolutely nothing while tying up your capital and your mental energy. That's where a time stop comes in handy.
A time stop is a pre-set rule that says you’ll exit a trade if it hasn’t hit your target within a certain timeframe. A day trader might give a trade two hours to work, while a swing trader might give it three days.
The logic is simple: good trades usually start working fairly quickly. If a trade is just sitting there, it’s often a sign your initial idea was off. It's better to cut it loose and put that money to work on a more promising opportunity.
Knowing the theory behind take profit and stop loss orders is one thing. Actually avoiding the common traps that trip up most traders? That’s what separates the pros from everyone else.
Even the most brilliant trading strategy can fall apart if you keep making the same simple mistakes. These errors almost always come down to psychology and a basic misunderstanding of how markets really move.
This is a classic. A trader sets their stop loss so close to their entry point that the market's normal, everyday volatility—what we call "market noise"—knocks them out of a perfectly good trade.
You’ve probably felt this pain before. A small, meaningless dip triggers your stop, and moments later, the price rips back in your intended direction, hitting what would have been your profit target. This creates a death by a thousand cuts, a frustrating cycle of small losses that should have been wins. Your trades need breathing room.
On the flip side, you have traders who set their stops way too wide. They’re so afraid of being stopped out early that they place their stop so far away that a single loss becomes a disaster. What should have been a small, controlled risk turns into a massive hit that erases weeks of hard-earned gains.
Let's be honest, this isn't a strategy—it's fear. You aren't giving the trade room to work; you're just refusing to admit you might be wrong. Remember, a stop loss is there to protect your capital, not to keep a bad trade on life support. For a deeper look at placement, check out our guide on the best stop loss strategy.
Another huge psychological mistake is moving your stop loss once the trade is live. The market turns against you, gets dangerously close to your stop, and you panic. You drag it a little further away, telling yourself, "It just needs a little more space." This completely destroys your original plan and turns a calculated risk into a reckless gamble.
Greed is just as dangerous as fear. Many traders set their take profit targets so far out that the market has virtually no realistic chance of ever getting there.
A great trade might move nicely in their favor, get close to the target, and then reverse course entirely, sometimes even turning into a loss. The problem? The target was based on hope, not an honest analysis of the market’s structure and volatility.
It's also worth remembering how clustered stop orders can pour fuel on the fire. During major market events, a wave of triggered stops can create a "price cascade," where one sale triggers another, and another, in a rapid downward spiral. Research into events like the 1987 crash shows just how this dynamic works, dramatically amplifying volatility. You can read more about how stop orders affect market moves in this report from the Federal Reserve Bank of New York.
The best traders don't just focus on finding winning entries; they master the art of disciplined exits. Avoiding these common mistakes is the first and most critical step toward long-term consistency and profitability.
Even when you've got a plan, the live market always throws a few curveballs. It's only natural for questions to pop up. Here are some quick, no-nonsense answers to the things traders ask most about take profit and stop loss orders.
There’s no magic number, but a 1:2 risk-to-reward ratio is a solid place to start. What does that mean? For every dollar you’re willing to lose, you’re aiming to make at least two.
Think about it: this setup means you can be wrong more often than you're right and still come out ahead. A ratio below 1:1, where you’re risking more than you stand to gain, is usually a recipe for disaster.
This is a tricky one. The golden rule is to never move your stop loss further away to give a losing trade more room to breathe. That's just inviting a bigger loss.
However, moving your stop loss up to your entry point (breakeven) once the trade is in profit is a smart way to take risk off the table. Using a trailing stop to lock in gains as the price moves in your favor is also a great advanced tactic.
Absolutely. Some traders, especially trend followers, ditch the fixed take profit target altogether. Instead, they use a trailing stop loss to let their winners run as long as the trend continues.
This strategy effectively turns your stop loss from a simple defensive shield into a tool that actively protects your mounting profits.
Ready to trade with more confidence? EzAlgo provides data-driven buy and sell signals, including suggested take profit and stop loss zones, to help you make smarter, more strategic decisions. Find out more about EzAlgo


%201.svg)