


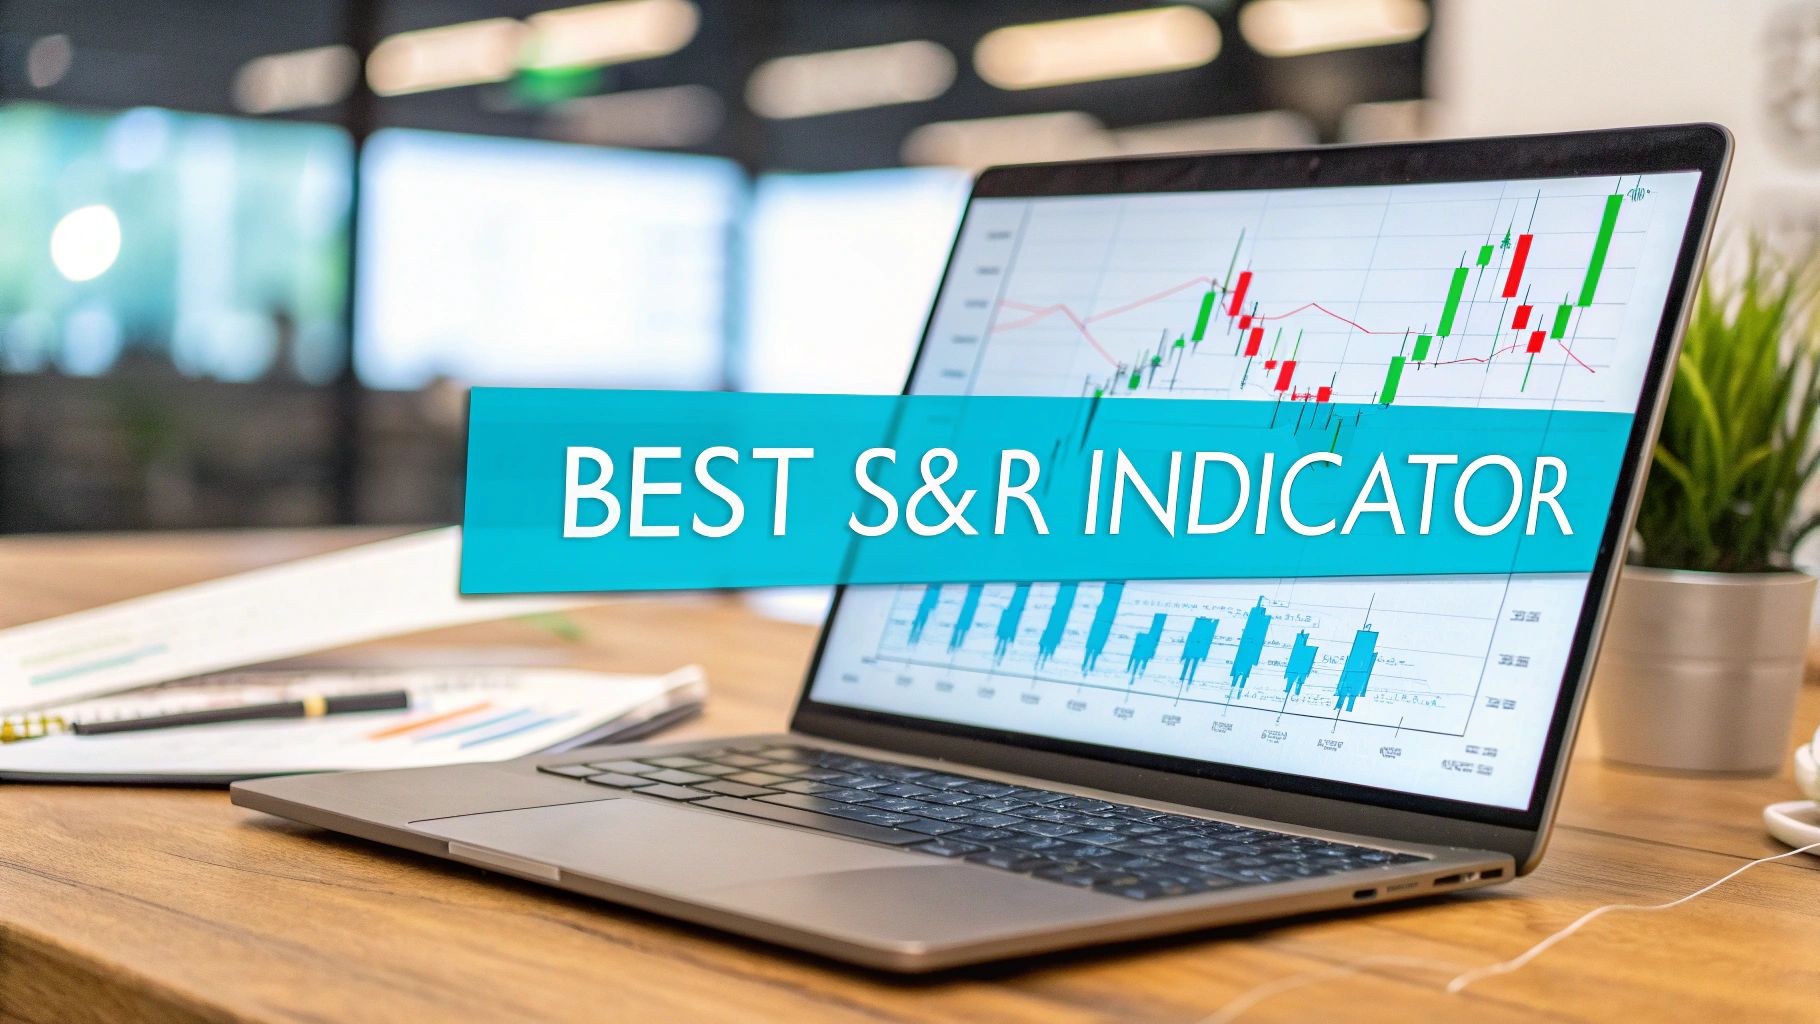
Pinpointing effective support and resistance levels is key to successful trading. This listicle reveals 8 of the best support and resistance indicators for 2025, helping you identify potential price reversals, breakouts, and optimal entry/exit points. Whether you're a beginner or an experienced trader seeking automated signals or advanced analysis, these tools provide valuable insights to boost your trading strategy. We'll cover popular indicators like Fibonacci Retracement, Moving Averages, and the Ichimoku Cloud, plus cutting-edge options including EzAlgo, all designed to eliminate the guesswork in finding key support and resistance levels.
EzAlgo stands out as a premium, AI-powered solution designed to identify optimal support and resistance levels, specifically tailored for TradingView users. This sophisticated tool aims to empower traders with precise buy and sell alerts, real-time momentum shift identification, and dynamically adjusting support and resistance levels. By leveraging advanced algorithms combined with live market data, EzAlgo attempts to remove the emotional element from trading, helping users approach the market with the calculated precision often associated with institutional investors. This translates to pinpointing opportune entry zones, automatically generating Golden Pocket Fibonacci levels, and providing valuable multi-timeframe insights. Whether you're a beginner seeking clear signals or an experienced trader looking for an edge in volatile markets, EzAlgo offers a comprehensive suite of features designed to enhance your trading performance. It’s an excellent choice for those looking for the best support and resistance indicator within the TradingView ecosystem.

One of EzAlgo's most significant advantages is its ability to generate non-repainting signals. Repainting indicators can be misleading, appearing to accurately predict price movements that then vanish or adjust as the market changes. EzAlgo tackles this issue head-on, providing more reliable signals that instill confidence and allow traders to make informed decisions. This is particularly crucial for identifying key support and resistance levels, as false breakouts can lead to significant losses. The dynamic nature of EzAlgo's support and resistance indicators, adjusting in real-time to market fluctuations, also contributes to more accurate trade setups.
Beyond its core functionality, EzAlgo provides a wealth of resources to support traders at all levels. Subscribers gain access to daily market analyses, curated long-term trade setups, and weekly livestreams hosted by professional analysts. These resources contribute to a continuous learning environment, further enhancing the tool's value. The active Discord community offers additional support and networking opportunities, fostering a collaborative atmosphere where traders can exchange ideas and learn from each other's experiences. This combination of cutting-edge technology and community engagement creates a robust ecosystem that caters to both technical analysis veterans and those new to the complexities of the financial markets.
EzAlgo caters to traders across a diverse range of markets, including stocks, cryptocurrencies, forex, futures, and commodities. This versatility eliminates the need for multiple platforms or complex coding, streamlining the trading process. For crypto and forex traders, EzAlgo offers an especially valuable advantage by delivering AI-driven reversal signals specifically tailored to these volatile markets. Identifying these critical turning points is essential for capitalizing on quick price swings and mitigating potential losses. Momentum traders will also appreciate the real-time bullish and bearish divergence detection provided by EzAlgo, adding an extra layer of confluence to their trading decisions.
The platform offers several subscription options, catering to varying budget needs and commitment levels. Users can choose between a monthly subscription for $75, an annual subscription for $600 (offering a 33% discount), or a lifetime access plan for $2250. While the absence of a free trial might be a drawback for some, the varied subscription models provide flexibility. The platform’s focus on transparency, with its non-repainting signals and comprehensive educational resources, underscores its commitment to user success.
However, it's important to note that EzAlgo is exclusively available on the TradingView platform. This exclusivity limits its accessibility for traders who prefer other charting software like MetaTrader. While this integration with TradingView allows for seamless functionality within that specific environment, it might exclude traders who are committed to other platforms.
In conclusion, EzAlgo delivers a powerful set of tools for identifying support and resistance levels within the TradingView environment. Its AI-driven alerts, non-repainting signals, dynamic indicators, and comprehensive educational resources make it a compelling option for traders seeking a data-driven edge. The diverse subscription models, coupled with its multi-market applicability, further enhance its appeal. While the lack of a free trial and TradingView exclusivity might be limiting factors for some, EzAlgo offers a comprehensive solution for those seeking to leverage the power of AI and community support within their TradingView workflow. It earns its place on this list as a strong contender for the best support and resistance indicator for TradingView users. You can explore EzAlgo further and subscribe through their website: https://www.ezalgo.ai
Pivot Points are a cornerstone of technical analysis, serving as one of the best support and resistance indicators available. They offer traders a straightforward yet powerful way to identify potential turning points in the market by calculating levels based on the previous period's high, low, and closing prices. These calculated levels act as potential support and resistance zones where price is likely to react. This makes Pivot Points particularly valuable for identifying potential entry and exit points, setting stop-loss orders, and anticipating price reversals. They are widely recognized and used, contributing to their effectiveness as self-fulfilling prophecies in the market. Because so many traders watch these levels, price often reacts predictably around them.

The core strength of Pivot Points lies in their simplicity and objectivity. The calculation is based on a straightforward mathematical formula, removing emotional bias from the process of identifying support and resistance levels. The standard Pivot Point formula calculates the central pivot level (PP) first. Then, using the PP, the first support (S1) and resistance (R1) are calculated. Subsequent support (S2, S3) and resistance (R2, R3) levels are derived from these initial values. This creates a framework of potential turning points above and below the central pivot. This objectivity makes Pivot Points an excellent tool for both beginners and experienced traders. Beginners gain a clear structure to understand price action, while seasoned analysts can integrate Pivot Points into their broader technical analysis strategies.
Pivot Points are not limited to any specific timeframe or market. Whether you're a day trader focusing on 5-minute charts or a swing trader analyzing weekly charts, Pivot Points offer insights into potential support and resistance zones. Their versatility extends across various asset classes, making them suitable for stocks, forex, cryptocurrencies, and commodities. This indicator works effectively in both ranging and trending markets. In ranging markets, the pivot point can act as a midline, with price oscillating between the support and resistance levels. In trending markets, the levels can serve as stepping stones, with the price breaking through one level and then finding support or resistance at the next.
This indicator is readily available as a standard feature in most trading platforms, including TradingView. You can easily add Pivot Points to your chart with a few clicks, typically finding them in the "Indicators" or "Studies" section. Learn more about Pivot Points for strategies and tips on utilizing this indicator. You’ll find most platforms automatically calculate daily, weekly, and monthly pivot levels, offering a multi-timeframe perspective. This is especially useful for swing and position traders who need to consider longer-term support and resistance zones. There are no additional costs or technical requirements associated with using Pivot Points, as they are a standard indicator included in most trading software packages.
While Pivot Points are a valuable best support and resistance indicator, they are not without limitations. As static levels, they don’t adapt to changing market conditions. During periods of high volatility, the pre-calculated levels may become less reliable as price swings can easily exceed them. Additionally, in strong trending markets, Pivot Points may generate false signals as the price continuously breaks through the levels without significant pullbacks. Therefore, it’s crucial to confirm signals derived from Pivot Points with other indicators, like moving averages, trendlines, or oscillators, and consider them within the broader market context. Combining Pivot Points with price action analysis can significantly enhance their effectiveness. For example, look for candlestick patterns or confluence with other indicators near the Pivot Point levels to increase the probability of a successful trade.
Fibonacci Retracement is a powerful technical analysis tool used to identify potential support and resistance levels in a market. It's based on the Fibonacci sequence, a series of numbers where each number is the sum of the two preceding ones (e.g., 0, 1, 1, 2, 3, 5, 8, 13, 21, etc.). The ratios derived from this sequence, such as 23.6%, 38.2%, 50%, 61.8%, and 78.6%, are believed to play a significant role in financial markets, marking potential reversal points within a trend. This makes Fibonacci Retracement a highly effective support and resistance indicator, particularly when combined with other technical analysis tools. It allows traders to anticipate potential price reversals and make informed trading decisions. It earns its spot on the list of best support and resistance indicators because of its widespread adoption, proven effectiveness, and applicability across diverse markets and timeframes.

Fibonacci Retracement works by identifying the swing high and swing low of a price movement. These points represent the peak and trough of a significant price swing. The retracement levels are then drawn horizontally between these two points, indicating the potential areas where the price might retrace before continuing in the original direction. For instance, if a stock rises from $10 to $20, the 23.6% retracement level would be at $17.64 (calculated as $20 - (0.236 * ($20 - $10))), representing a potential support level where the price could bounce back up.
Practical Applications and Use Cases:
Implementation and Setup Tips:
Pros and Cons:
Pros:
Cons:
Moving averages are a cornerstone of technical analysis, serving as dynamic support and resistance levels that adapt to changing market conditions. Unlike static lines drawn on a chart, moving averages move with the price, providing a real-time view of potential support and resistance zones. This makes them a powerful tool for traders seeking the best support and resistance indicator for identifying potential entry and exit points. They are readily available on virtually all trading platforms and are relatively straightforward to understand and implement, making them suitable for both novice and experienced traders.

There are various types of moving averages, each with its own calculation method and characteristics. The most common include the Simple Moving Average (SMA), which calculates the average price over a specified period; the Exponential Moving Average (EMA), which gives more weight to recent prices; and the Weighted Moving Average (WMA), which assigns linearly decreasing weights to older prices. Learn more about Moving Averages (Dynamic S&R) This variety allows traders to choose the moving average that best suits their trading style and market conditions. Popular periods for moving averages are 20, 50, 100, and 200 periods, though these can be adjusted based on individual preferences and the timeframe being analyzed. For example, short-term traders might use shorter periods like 10 or 20, while long-term investors might focus on longer periods like 200 or even 500.
One of the key advantages of moving averages is their dynamism. In an uptrend, a moving average will typically act as a support level, preventing the price from falling significantly. Conversely, during a downtrend, it serves as resistance, hindering upward price movement. This dynamic nature makes moving averages particularly effective in trending markets, where they can help identify potential entry and exit points with greater accuracy than static support and resistance lines. Furthermore, the confluence of multiple moving averages can create particularly strong support or resistance zones. For instance, the crossover of a shorter-period moving average (e.g., 20-period) above a longer-period moving average (e.g., 50-period) is often seen as a bullish signal, while the opposite crossover can signal a bearish trend reversal.
While moving averages offer valuable insights, they also have limitations. In sideways or choppy markets, where price oscillates within a range, moving averages can generate false signals, leading to whipsaws and losses. Additionally, as lagging indicators, they react to price changes rather than predicting them. This means that signals based on moving averages can be late, particularly in fast-moving markets. Therefore, it's crucial to combine moving averages with other technical indicators and price action analysis to confirm signals and improve trading decisions.
Implementing moving averages is straightforward. They are standard features on nearly all trading platforms, from TradingView to MetaTrader, and require no additional software or subscriptions. To use them, simply select the desired moving average type (SMA, EMA, WMA, etc.) and the period from your platform's indicator list. You can then plot multiple moving averages with different periods on the same chart to identify potential confluence zones.
For beginners, starting with the common periods (20, 50, 100, 200) on a daily timeframe can be a good starting point. As you gain experience, you can experiment with different periods and moving average types to find what works best for your trading strategy. For experienced traders, combining moving averages with other indicators, such as oscillators or volume-based indicators, can provide a more comprehensive view of the market and enhance trading accuracy. For instance, looking for divergences between price and a moving average can signal a potential trend reversal. Momentum traders can use moving averages to confirm breakouts and ride trends, while traders seeking automated signals can create alerts based on moving average crossovers.
Moving averages, with their dynamic nature, ease of use, and widespread availability, rightfully earn their place among the best support and resistance indicators. They offer a valuable tool for identifying potential trading opportunities across various markets and timeframes. However, it's crucial to understand their limitations and use them in conjunction with other technical analysis techniques for optimal results. More information regarding moving averages can be found on websites like Investopedia (https://www.investopedia.com/terms/m/movingaverage.asp).
Bollinger Bands are a powerful technical analysis tool that deserves a place among the best support and resistance indicators. They provide a dynamic perspective on support and resistance levels, adapting automatically to changing market volatility. Unlike static indicators like horizontal lines or Fibonacci retracements, Bollinger Bands expand and contract, offering valuable insights into price action and potential trading opportunities. This adaptability makes them particularly attractive for retail traders, experienced analysts, and crypto/forex traders navigating volatile markets.
At their core, Bollinger Bands consist of three lines:
The dynamic nature of Bollinger Bands stems from the use of standard deviation, which measures price volatility. When volatility increases, the bands widen; when volatility decreases, they contract. This “breathing” action reflects the market's current state and provides crucial context for price movements.
Practical Applications and Use Cases:
Implementation and Setup Tips:
Bollinger Bands are readily available on most trading platforms, including TradingView. The standard settings (20-period SMA, 2 standard deviations) are a good starting point, but they can be customized to suit individual trading styles and market conditions. For example, more volatile markets might benefit from a higher standard deviation setting.
Comparing with Similar Tools:
While other support and resistance indicators exist, such as Keltner Channels and Donchian Channels, Bollinger Bands stand out due to their adaptive volatility calculation and widespread usage. Keltner Channels use Average True Range (ATR) for volatility measurement, while Donchian Channels use a fixed price range. Bollinger Bands, with their focus on standard deviation, offer a nuanced approach that caters to different market environments.
Pros and Cons:
Pros:
Cons:
Website:
Learn more about Bollinger Bands at https://school.stockcharts.com/doku.php?id=technical_indicators:bollinger_bands.
For traders looking for automated buy/sell signals, real-time momentum analysis, and advanced support and resistance indicators, Bollinger Bands offer a valuable addition to their toolkit. Understanding the nuances of this dynamic indicator can significantly enhance trading decisions and improve market analysis. Experienced traders can leverage Bollinger Bands to identify potential key levels automatically, saving time and effort, while beginners can use them as a foundational tool for learning about support, resistance, and volatility.
The Ichimoku Cloud, often referred to as "Kumo," stands out as one of the best support and resistance indicators available for traders of all levels. Unlike other indicators that provide single levels, the Ichimoku Cloud offers a comprehensive view of support and resistance zones, projected both in the present and future. This "one-glance" system incorporates multiple data points to give traders a clearer understanding of potential price action, making it a valuable tool for identifying trading opportunities in various markets, from forex and crypto to stocks and commodities. It’s particularly appealing to those seeking dynamic support and resistance levels that adapt to changing market conditions.

The Ichimoku Cloud's strength lies in its five key components: Tenkan-sen (conversion line), Kijun-sen (base line), Senkou Span A (leading span A), Senkou Span B (leading span B), and Chikou Span (lagging span). The "cloud" itself is formed by the area between Senkou Span A and Senkou Span B. These lines interact to generate signals, with the cloud acting as the primary zone of support and resistance. When the price is above the cloud, it suggests a bullish trend, while a price below the cloud signals a bearish trend. Traders often look for price to break above or below the cloud as a confirmation of trend reversals, a feature highly valued by momentum traders. Moreover, the thickness of the cloud can indicate the strength of the support or resistance. A thicker cloud implies stronger support or resistance. This feature helps minimize false breakouts, a common frustration experienced by traders using simpler support and resistance indicators.
For retail traders seeking automated buy/sell signals, the Ichimoku Cloud can be combined with other indicators to create robust trading strategies. For example, a crossover of the Tenkan-sen and Kijun-sen can be used as a buy or sell signal, confirmed by the price's position relative to the cloud. This offers the real-time momentum analysis desired by active traders. Experienced technical analysts can leverage the Ichimoku Cloud's multiple components for advanced support and resistance identification and confirmation. The Chikou Span, plotted 26 periods in the past, can help identify historical support and resistance levels, adding another layer of analysis.
Crypto and forex traders facing volatile markets find the Ichimoku Cloud's future projection particularly beneficial. The cloud itself is plotted 26 periods ahead, giving traders a preview of potential future support and resistance zones. These leading spans can provide valuable insights into potential reversal points, crucial for navigating rapidly fluctuating markets. For TradingView users, integrating the Ichimoku Cloud is straightforward, allowing customization and alerts based on specific cloud interactions or price breakouts. The indicator is generally available as a standard feature on most trading platforms including TradingView.
While immensely powerful, the Ichimoku Cloud does present a learning curve. Beginners may find the multiple lines and their interactions overwhelming initially. Understanding the role of each component and how they contribute to the overall picture is essential for effective use. This complexity can also lead to conflicting signals between components, requiring careful interpretation. Though originally designed for Japanese candlestick charts and specific timeframes, the Ichimoku Cloud has proven effective across various markets and timeframes with appropriate adjustments. Beginner traders are encouraged to start with the basic interpretations of the cloud and gradually incorporate the other components as their understanding grows. Educational resources, including the linked Investopedia article (https://www.investopedia.com/terms/i/ichimoku-cloud.asp), provide valuable information and practical examples to facilitate the learning process.
Despite its complexity, the Ichimoku Cloud offers a comprehensive approach to support and resistance, proving valuable for both novice and experienced traders. Its unique ability to project future support and resistance zones, combined with its multiple confirmation signals, sets it apart as one of the best support and resistance indicators available. For traders willing to invest the time to master it, the Ichimoku Cloud can significantly enhance their trading strategies and decision-making process. For experienced traders, the Ichimoku Cloud's readily available key levels can save valuable time and provide an additional layer of confidence in their trading analysis.
The Volume Profile stands out as a powerful support and resistance indicator, distinguishing itself from traditional methods by focusing on volume traded at specific price levels rather than just price action alone. It provides a unique perspective into the dynamics of the market, revealing where substantial trading activity has clustered. This information is invaluable for identifying potential support and resistance zones, understanding price movements, and making informed trading decisions. It's particularly well-suited for traders who want to identify high-probability trading setups based on actual market activity rather than just lines on a chart. Therefore, it earns its place on this list of best support and resistance indicators as a robust tool for both beginner and advanced traders.

The Volume Profile visualizes trading activity as a horizontal histogram overlaid on the price chart. Each horizontal bar represents a specific price level, and the length of the bar corresponds to the volume traded at that price. This allows traders to quickly identify areas of high volume, known as High Volume Nodes (HVNs), and areas of low volume, known as Low Volume Nodes (LVNs). HVNs often act as strong support or resistance levels because they represent price levels where a significant number of buyers and sellers have transacted in the past. Conversely, LVNs signify areas where price can move quickly due to a lack of prior trading activity. Learn more about Volume Profile to deepen your understanding of these concepts.
A crucial element within the Volume Profile is the Point of Control (POC), represented by the longest horizontal bar. This indicates the price level with the highest traded volume within the specified period. The POC often acts as a magnet for price, with prices tending to gravitate towards this level. It can be a valuable reference point for anticipating potential price reversals or breakouts. Additionally, some Volume Profile implementations integrate the Volume Weighted Average Price (VWAP), which further aids in identifying fair value areas. This combined approach empowers traders with a comprehensive view of market dynamics, integrating both volume and price information.
For those seeking automated buy/sell signals and real-time momentum analysis, or are experienced technical analysts aiming for advanced support and resistance indicators, the Volume Profile offers several advantages. It’s based on actual trading activity and volume data, providing strong psychological support and resistance levels that aren’t arbitrary lines drawn on a chart. The POC frequently acts as a powerful price magnet, creating predictable trading opportunities. Furthermore, the Volume Profile is effective for identifying fair value areas, helping traders determine optimal entry and exit points. Crypto and forex traders, particularly those dealing with volatile markets, can leverage the Volume Profile to gain a clearer picture of market dynamics and identify potential reversal points.
While generally available on platforms like TradingView (see their support page for more details), its availability as a standard feature might vary depending on the specific platform and data feed. Volume data is crucial for using the Volume Profile, and it may not be available for all instruments, particularly over-the-counter (OTC) markets or less liquid assets. This reliance on historical volume data can also limit its real-time effectiveness, especially in rapidly changing market conditions. Beginners might also find it complex to interpret initially, requiring practice and understanding of volume analysis principles. However, once mastered, the Volume Profile offers a powerful edge for traders of all levels.
Implementing the Volume Profile typically involves selecting the desired time period and volume calculation method within your trading platform. The time period can range from intraday charts to longer-term timeframes, depending on your trading style. Experimentation is key to finding the optimal settings for your specific needs and market. TradingView users, for instance, can customize the Volume Profile’s parameters, including the time period, value area calculation, and display options, making it a versatile tool for both beginner traders looking for educational resources and experienced traders seeking automated key levels to streamline their analysis. While pricing varies depending on the platform and data feed, the Volume Profile is often included as part of a broader charting package or available as an add-on.
The Parabolic SAR (Stop and Reverse) is a powerful trend-following indicator that deserves a spot on the list of best support and resistance indicators due to its unique ability to dynamically trail price action and provide potential reversal points. Unlike static support and resistance levels drawn from previous highs and lows, the Parabolic SAR adapts to the current market conditions, offering a real-time view of potential support and resistance zones. This makes it an invaluable tool for traders seeking automated buy/sell signals and real-time momentum analysis. It's particularly well-suited for trending markets where traditional support and resistance levels may quickly become obsolete. This indicator helps traders identify potential entry and exit points, set stop-loss orders, and manage their positions effectively.

The Parabolic SAR is visually represented as a series of dots plotted above or below the price candles. When the dots are below the price candles, it signifies an uptrend, and the dots act as a trailing support level. Conversely, when the dots are above the price candles, it indicates a downtrend, with the dots serving as a trailing resistance level. This visual representation allows for quick and easy interpretation of trend direction, making it suitable even for beginner traders looking for educational resources and proven strategies.
One of the key features of the Parabolic SAR is its accelerating factor. As a trend extends, the acceleration factor increases, causing the SAR dots to move closer to the price. This acceleration reflects the increasing momentum of the trend and provides a built-in stop-loss mechanism for trend-following strategies. This feature is highly beneficial for experienced technical analysts aiming for advanced support and resistance indicators, allowing them to manage risk effectively and potentially maximize profits. Moreover, the customizable acceleration factor and maximum step parameters offer further flexibility for traders to fine-tune the indicator to their specific needs and market conditions.
While the Parabolic SAR excels in trending markets, providing clear visual signals and acting as a trailing stop-loss for position management, it has certain limitations. Like other momentum-based indicators, the Parabolic SAR is susceptible to whipsaws in sideways or choppy markets. During consolidation periods, the indicator can generate false signals, leading to premature entries and exits. Experienced traders looking for automatic key levels to save time and headaches might find its performance inconsistent in range-bound markets. Therefore, it is crucial to understand that the Parabolic SAR is not effective during consolidation and may miss significant portions of trends due to its sensitivity.
Compared to other support and resistance indicators like Fibonacci retracements or pivot points, the Parabolic SAR offers a dynamic approach that adapts to changing market conditions. While Fibonacci and pivot points provide static levels, the Parabolic SAR evolves with the price action, offering a more responsive view of potential support and resistance. This dynamic nature makes it particularly appealing to crypto and forex traders needing AI-driven reversal signals tailored to volatile markets.
The Parabolic SAR is readily available on most trading platforms, including TradingView, making it accessible to a wide range of traders. TradingView platform users desiring integrated algorithms and customizable alerts will find the Parabolic SAR a valuable addition to their toolkit. Generally, there are no additional pricing or technical requirements to use the Parabolic SAR indicator. It is often included as a standard feature within charting software.
For implementation, simply add the Parabolic SAR indicator to your chart. Most platforms allow customization of the acceleration factor and maximum step. A common starting point is an acceleration factor of 0.02 and a maximum step of 0.2. However, these values can be adjusted based on individual trading styles and market volatility. It is advisable to experiment with different settings on a demo account to find the optimal configuration. Momentum traders who want real-time bullish and bearish divergences as extra confluence can use the Parabolic SAR in combination with other indicators to confirm signals and improve trading accuracy.
Finally, for further information and a deeper understanding of the Parabolic SAR, refer to Investopedia (https://www.investopedia.com/terms/p/parabolicindicator.asp). This resource provides a comprehensive overview of the indicator, its calculations, and practical applications.
Finding the best support and resistance indicator is crucial for any trader seeking an edge in the market. From classic tools like Pivot Points and Fibonacci Retracement to dynamic indicators such as Moving Averages and Bollinger Bands, this article explored a range of powerful options. We also delved into the nuances of Ichimoku Cloud, Volume Profile, and the Parabolic SAR, offering insights into how these indicators can help identify key price levels. Remember, the most effective approach often involves combining multiple support and resistance indicators for stronger confirmation. Whether you're a beginner looking for clear signals or an experienced trader seeking advanced analysis, understanding these tools is paramount. Consider your individual trading style, preferred markets (like crypto or forex), and the need for automated signals or real-time momentum analysis when making your choice. Factors like volatility and your desired level of customization should also inform your selection.
Picking the right tool is like adding a powerful lens to your trading strategy, allowing you to identify crucial turning points and make more informed decisions. Implementing these indicators effectively takes practice, so experiment with different combinations and backtest your strategies to discover what works best for you. The insights gained from mastering support and resistance can significantly enhance your trading approach and pave the way for greater success.
Want to simplify finding optimal support and resistance levels, especially in volatile markets? EzAlgo offers AI-driven insights and automated analysis, helping you identify key levels with ease and precision. Visit EzAlgo today to explore how this powerful tool can elevate your trading game and save you valuable time and effort.
Article created using Outrank


%201.svg)